SEA TURTLE LIFE CYCLE
In homeschool preschool this week, we’re studying the sea turtle life cycle. I’ve also included a FREE Montessori printable that goes with this Safariology set.
Oh, and did I mention this sensory play is taste-safe?
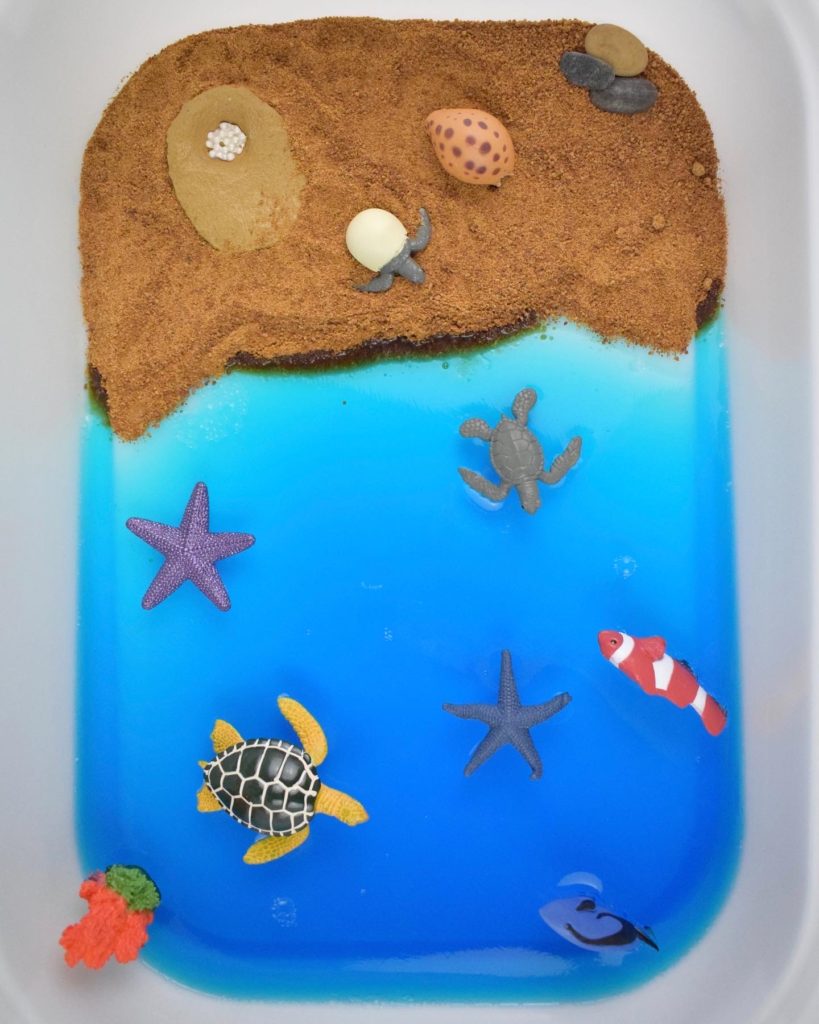
Sea Turtle Life Cycle
This multi-part activity demonstrates the life cycle of a sea turtle and the environmental effects of oil spills. The best part is, it’s completely taste-safe for littles!
WHAT YOU NEED:
- Clean bin or container (I use the Trofast Bins from IKEA.)
- Blue Jell-o
- Coconut Sugar
- Safari Ltd. Life Cycle of a Sea Turtle
- Safari Ltd. Coral Reef TOOB (Optional)
Free Montessori Printable
INSTRUCTIONS:
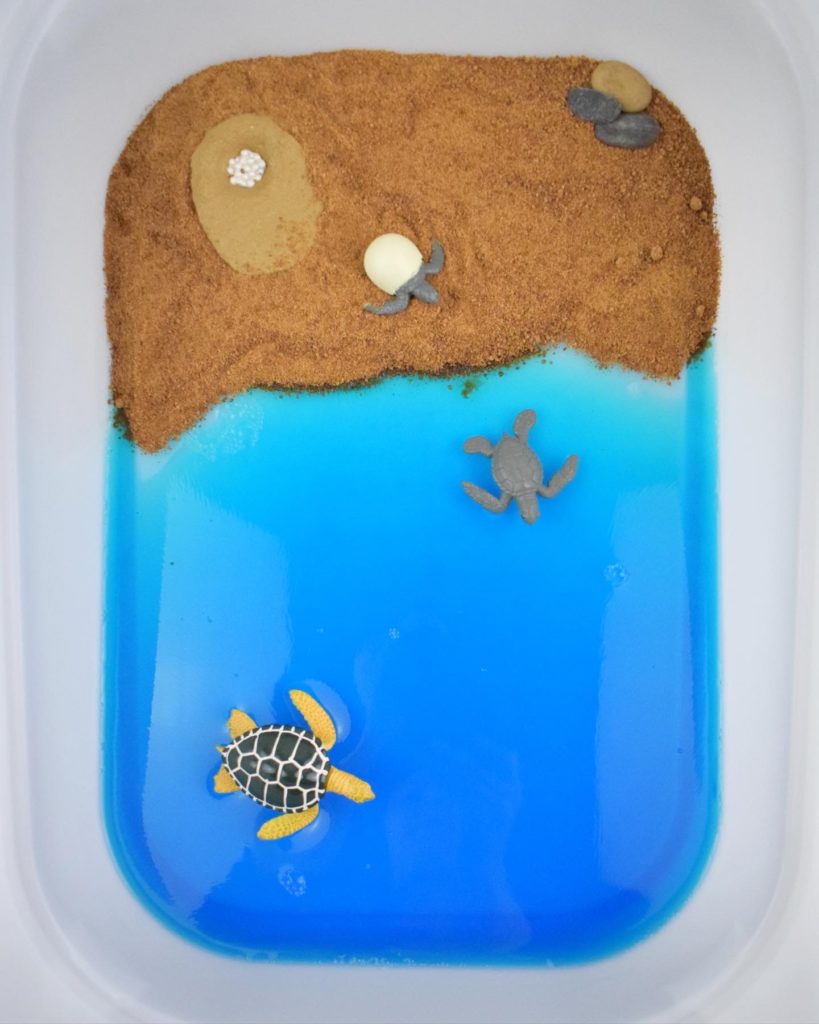
1.) First. prepare Jell-o as instructed. Pour into sensory bin and place in refrigerator at a slanted angle. The slanted angle will make one side of the ocean appear deeper than the other.
2.) Once the Jell-o is set, pour coconut sugar into the other side of the sensory bin as the sand.
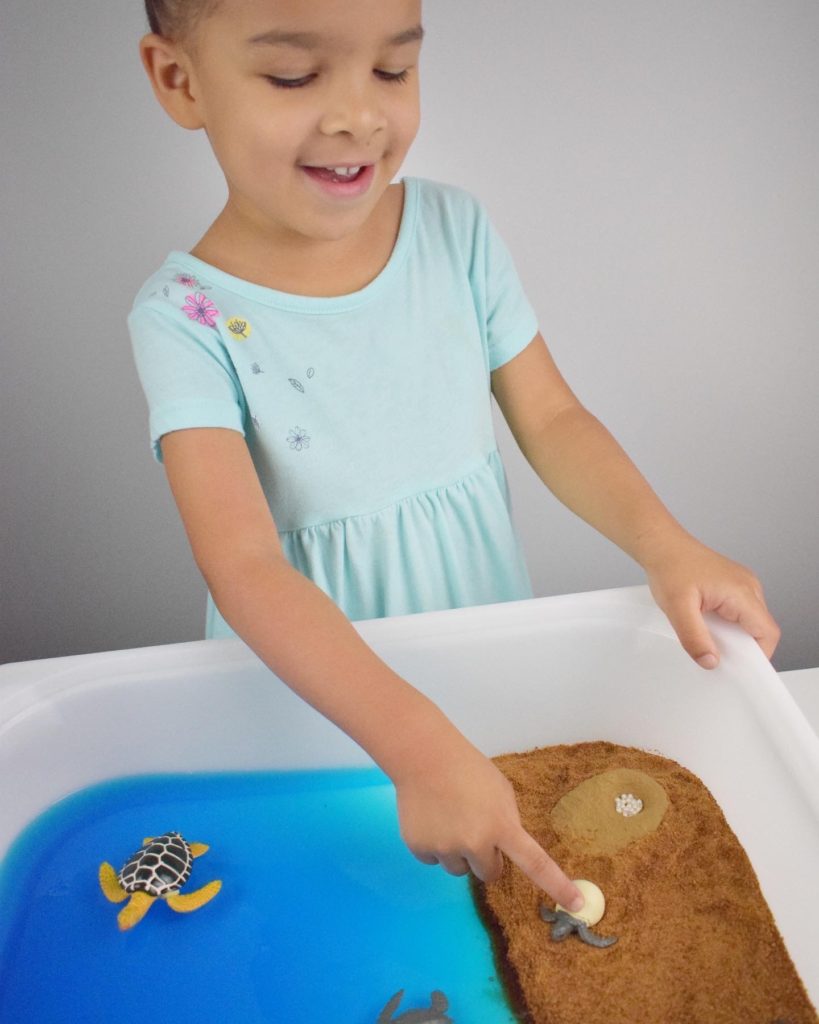
3.) Next, add the 2 larger sea turtle figurines to the water. Place the sea turtle hatchling and the eggs in the “sand.”
4.) Begin talking to your child about the four major stages in the lives of sea turtles. For example:
- A.) Sea Turtle Eggs
- B.) Sea Turtle Hatchling
- C.) Juvenile Sea Turtle
- D.) Adult Sea Turtle
5.) Finally, the best part is allow your child to learn through play!
Oil Spill Activity
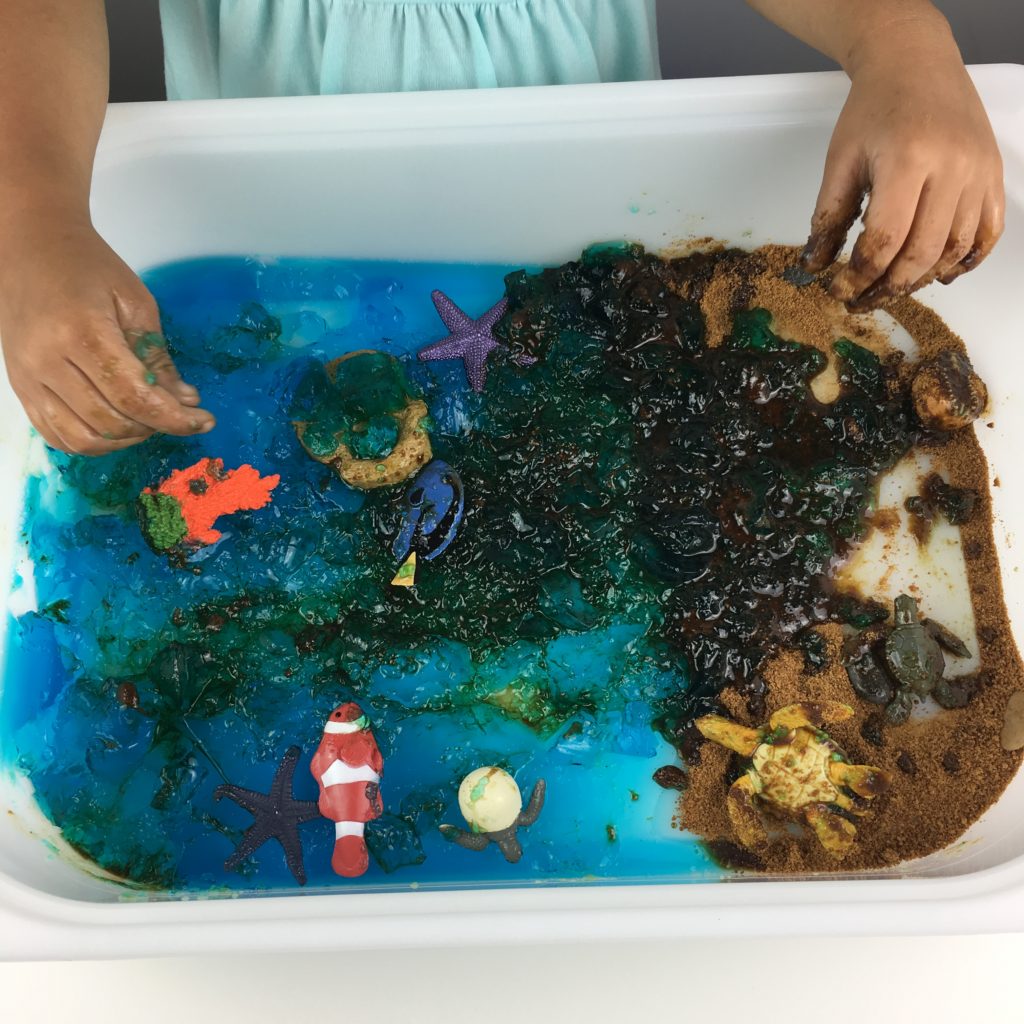
Once the coconut sugar mixed with the Jell-o, we noticed it turned dark brown like an oil spill. Consequently, this created a learning opportunity about the effects of oil spills on animals and the environment.
Meanwhile, I began showing Miss 4 videos of past oil spills. As you can imagine, she was heartbroken for the animals. But, she was happy to see some of the animals saved by being cleaned with Dawn dish soap.
Above all, this created an entirely new learning experience through play. I moved her bin to the bathtub and gave her a clean bin with Dawn dish soap. She washed each animal to remove all the “oil.” Talk about a wonderful teaching moment.
MORE FUN ACTIVITIES:
1.) Set up this Spring Sensory Bin in less than 10min. using dried beans, planters and flowers.
2.) You can also change up the sensory material, and try our recipe for Snow Dough here.
3.) Try this FREE Blooming Puddle Paper Flowers activity today! Simply print, color, cut and fold according to the instructions. Then, watch the magic happen.
4.) For more fun play-based learning activities, try this DIY Kid’s Play Tray!
Disclosure: Some of the links in the post above are “affiliate links.” Therefore, if you click on a link and purchase the item, we will receive a small commission. Regardless, we give our promise that we only recommend products or services that we use personally. Above all, we believe this adds value to our readers.

One Comment