Kool-Aid-Dyed Easter Eggs
Have you ever wanted to try dying Easter eggs a different way than the traditional box kit method? If so, I have a super fun way to make Kool-Aid-dyed Easter eggs that you will love. You can make solid or speckled eggs with this method.
And if you are looking to decorate your house for Easter or spring, I have 15 festive and fun DIY Easter decorations you can try here.
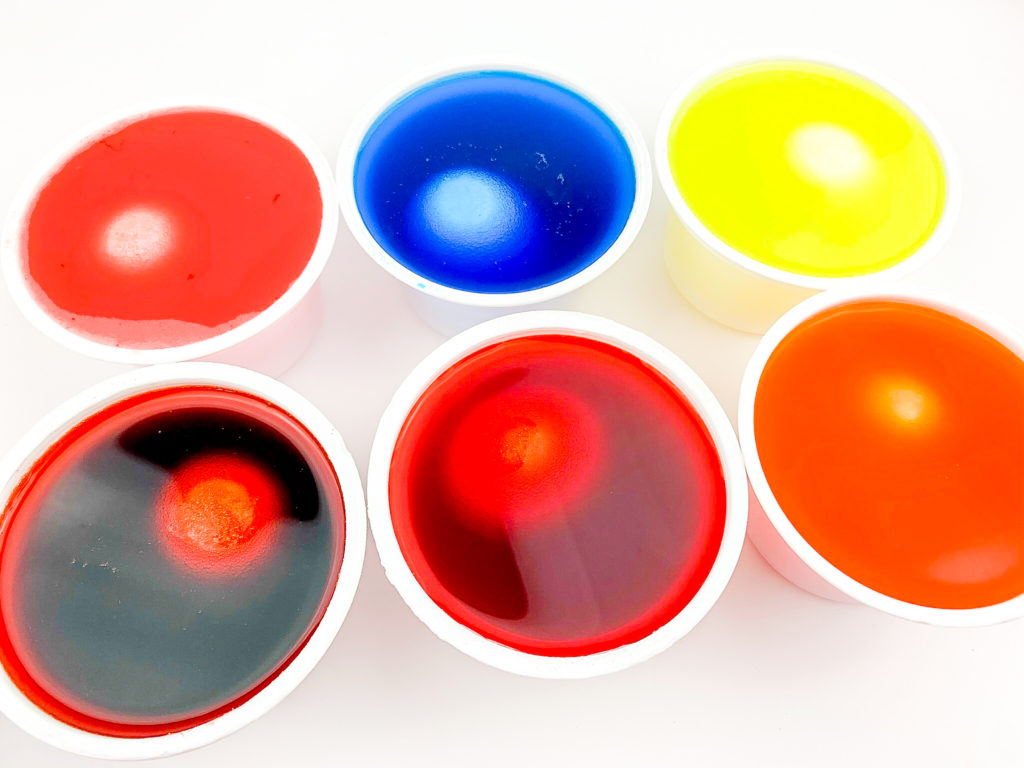
WHAT YOU NEED:
- Small Containers (Large enough to submerge an egg. In this case, I used recycled Greek yogurt containers.)
- Paper towel-lined tray or plate
- Spoon
- Water
*NOTE: The actual color of each packet is shown in the cup that the Kool-Aid man is holding in his hand.
Kool-Aid-Dyed Easter Eggs INSTRUCTIONS:
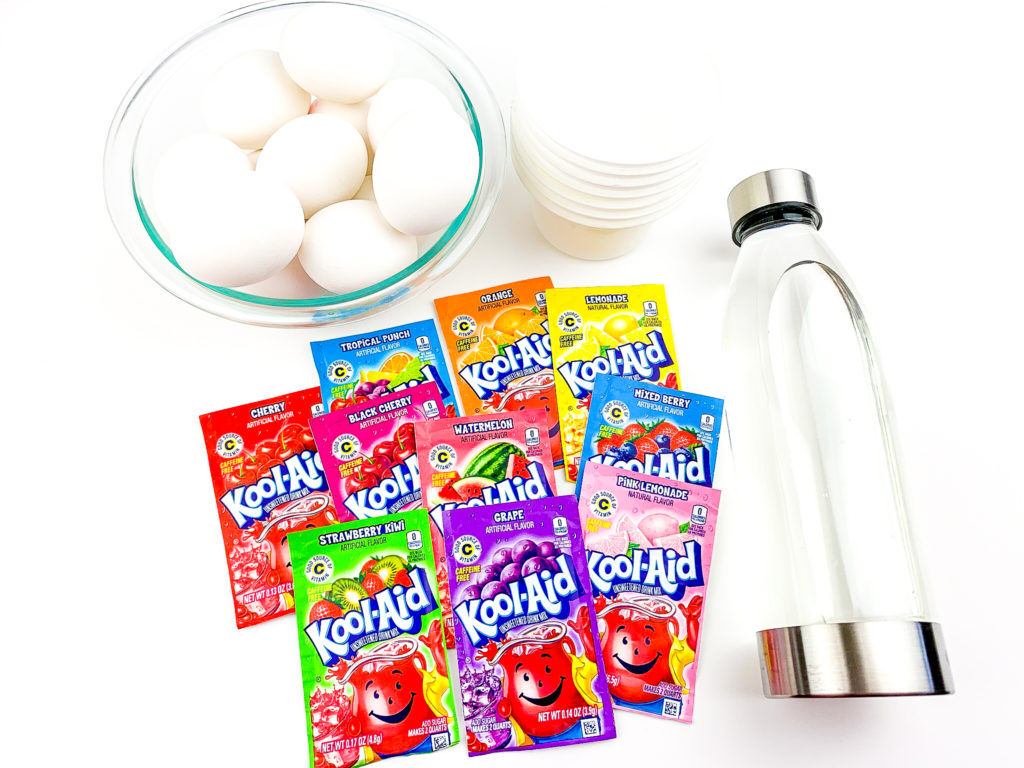
1.) First, pour water into each container and fill about ¾ full.
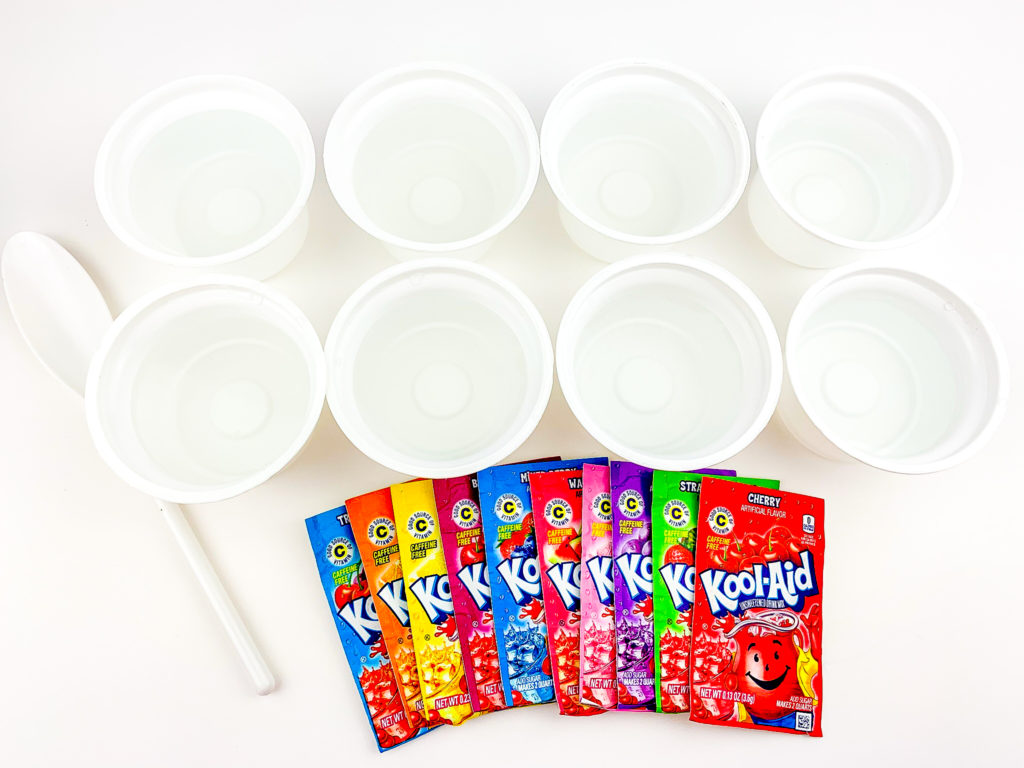
2.) Next, add a full packet of Kool-Aid mix to each container of water. Stir well with the spoon. Make sure to wipe your spoon in between mixes so you do not mix the darker colors with the lighter colors.

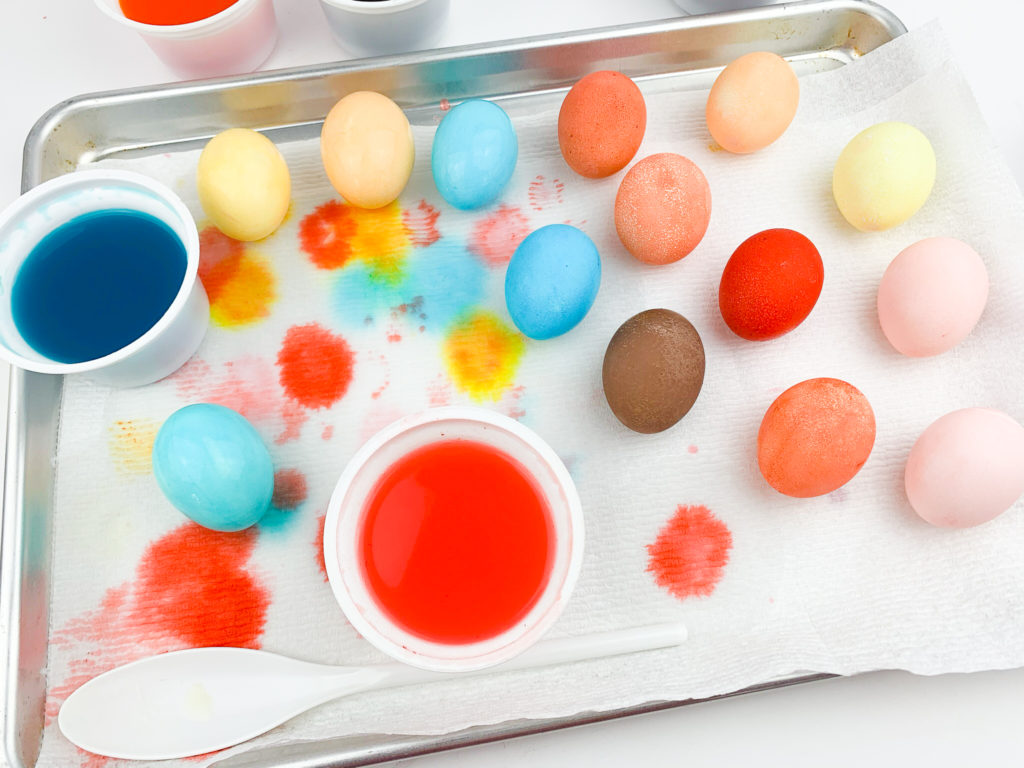
3.) * Then place an egg into each cup of Kool-Aid mix for 30 seconds to one minute. If your eggs float toward the surface, simply turn them over during the dyeing process with a spoon. That will give your eggs a more even color.
4.) Finally, once the egg reaches the color you like, carefully transfer it to the paper towel-lined tray to dry. Move the egg around occasionally as it dries to avoid a paper towel mark.
*The Maternal Hobbyist Tips:
- For lighter eggs, leave the egg submerged for about a minute or less, and check the egg until the desired color is achieved.
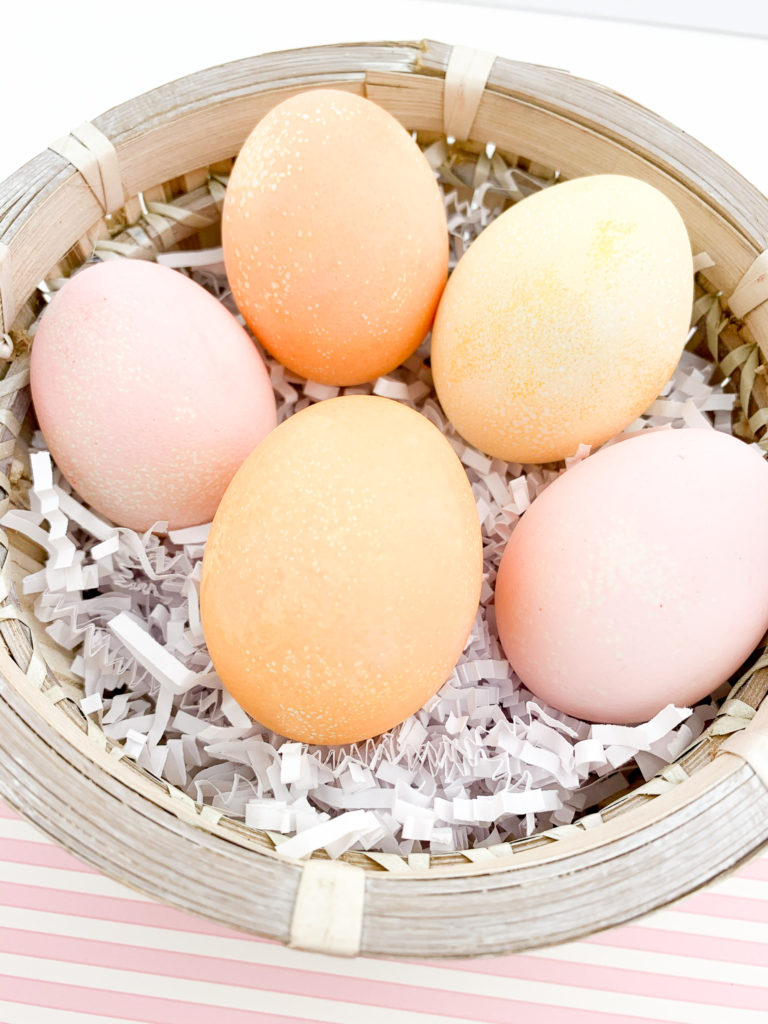
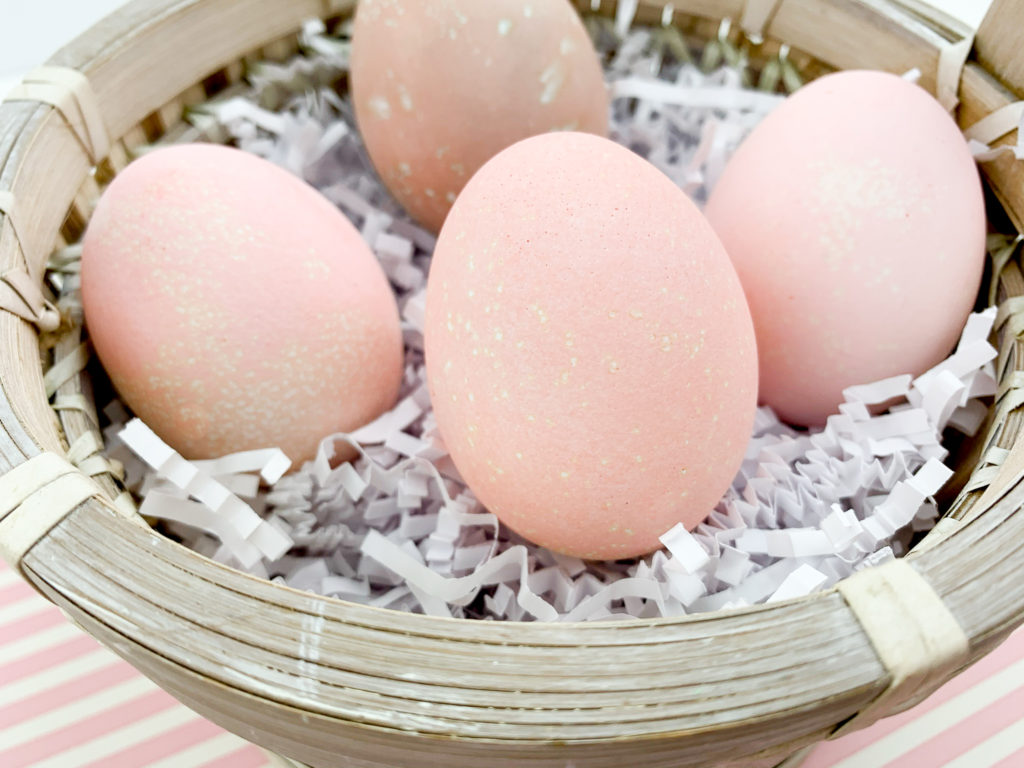
- For a speckled look, leave the egg in longer. When you take the egg out, you may notice a film around the egg. This is ok! Gently place the egg onto the paper towel and allow the egg to dry. Do not rub the egg, or the film will smear! If this happens, wash the egg off (the film will wash off) and re-dye the egg. Place the egg onto the paper towel carefully. Once dried, the egg will have a nice speckled look that does not smear.
My Happy Discovery
After I dyed my first egg, I thought the entire project was a failure due to the film that formed on the eggs. However, once I realized that the Kool-Aid-dyed Easter Eggs dry well, it really does create a nice effect on the eggs! For this project, I did a variety of both the lighter method and the speckled method.
In short, I hope you enjoy making these Kool-Aid-dyed Easter eggs. I would love to hear how your eggs turn out in the comments below. Also, feel free to tag me on social media so I can share your creations. You can tag my Instagram here.
NON-CANDY EASTER BASKET IDEAS:
Likewise, if you are preparing for Easter like we are and you would like some non-candy ideas, check out our blog post with 30 Non-Candy Easter Basket Ideas here.
MORE SPRING ACTIVITIES:
Try this FREE Blooming Puddle Paper Flowers activity today! Simply print, color, cut, and fold according to the instructions. Then, watch the surprise happen.
Disclosure: Some of the links in the post above are “affiliate links.” Therefore, if you click on a link and purchase the item, we will receive a small commission. Regardless, we give our promise that we only recommend products or services that we use personally. Above all, we believe this adds value to our readers.