Blooming Puddle Paper Flowers
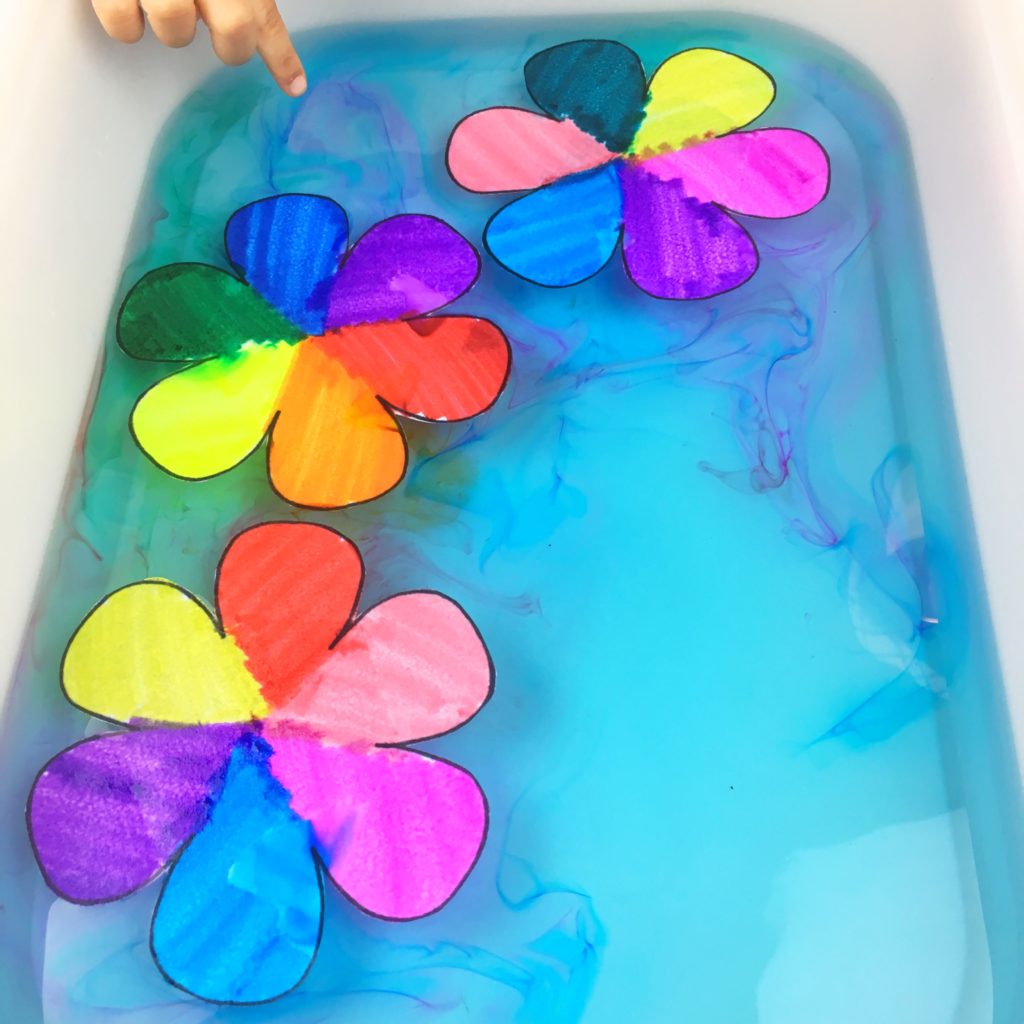
We’re participating in the monthly “Weather” play prompt with Our Sensory Kids. Today’s theme is “Puddles.” Miss 2 said we should make an indoor “puddle” with flowers because she’s anxiously waiting for Spring to arrive. We made these Blooming Puddle Paper Flowers as our kids Spring activity and it was magical! (Cue the fireworks.)
Scroll down to see the puddle paper flowers bloom in the water.
Jump ahead to:
What You Need:
- Regular Printer Paper
- Markers or Crayons
- Container or Pan filled with 1-2 inches of Water (To make it more fun, I add blue food coloring to the water.)
- This Free Blooming Puddle Paper Flowers Printable Below.
Instructions:
1.) Print the free Blooming Puddle Paper Flowers Printable above.
2.) Have your kiddos color the paper flowers with crayons or markers. If they use markers, make sure to let the paper dry completely before doing this activity.
3.) Cut the flowers out around the black outline.
4.) Fold the flower petals into the center. Do not crease the petals tightly, just loosely fold the petals or they will not open well.
5.) Have your child gently place each flower into the water and watched it bloom! We like to do ours one at a time so we can admire the blooming process.

The paper absorbs the water which causes the petals to “bloom” (open.) These are definitely amazing to watch. Each petal opens one at a time, just like a real flower.
So, if you want to watch the amazement in your child’s eyes, try this activity.
Head over to Teach Beside Me to see the original post that inspired me to try this activity.
More Fun Activities:
For more fun play-based learning activities, try this DIY Kid’s Play Tray!
If you’d like to change up the sensory material, check out our recipe for Snow Dough here.
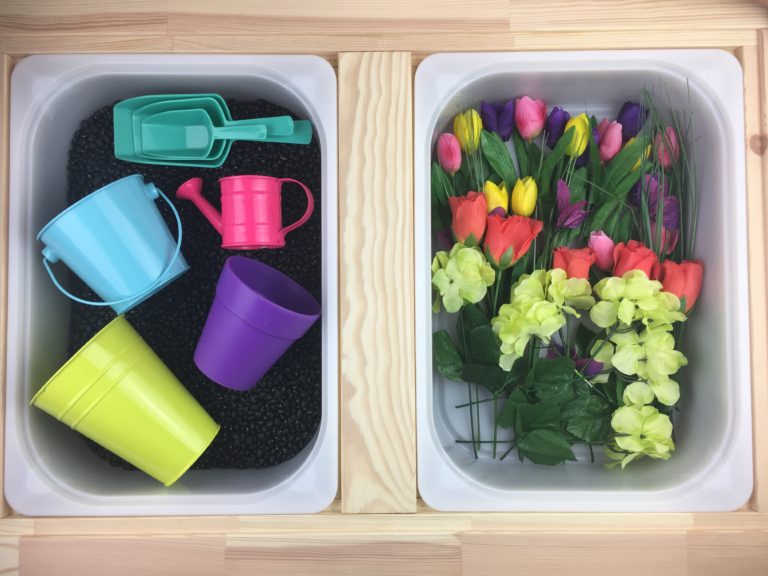
Your flowers are amazing, but can I also ask you about your sensory table? It looks IKEA-hacked: are you happy with it, and how did you do it?
Hi Kristi! Yes, of course. We love our sensory table! It’s the IKEA FLISAT Table ($49.99) with the matching FLISAT Children’s Stool ($17.99.) We use 2 white TROFAST storage boxes ($3/ea) as the sensory bins. I have extra bins with matching lids ($1.50/ea) so I can prepare a sensory bin and have it ready for the following day. This is the most cost-effective sensory table and it comes with two flat pieces that simply sit over the top of bins so it can be used as a craft table as well. I highly recommend it!
Any paper is work?? Or special paper??
Hi, Yes. Any type of paper will work. I used regular printer paper for this activity. We colored the printer paper with regular markers and let the paper dry completely. Then we did the activity. If you try this activity, I’d love to hear how it goes! Please tag me on social media @TheMaternalHobbyist so I can share it with other parents.