SEW A PINEAPPLE MATH SOFTIE

Every year in July, Trixi from Coloured Buttons hosts Sew A Softie. This month-long tutorial hop is aimed at encouraging kiddos to build new skills and develop a love for sewing.
I introduced Miss 3 to sewing at age one, through lacing beads. Then, she transitioned to lacing cardboard shapes and animals. At age two, she made her first softie and loved the process! Play-based learning seems to be her focus now at age three, so we created this pineapple math softie as a way to build her sewing skills and practice counting.
Jump ahead to:
You Will Need:
- 1 sheet of 9″x12″ Yellow Felt
- 1 sheet of 9″x12″ Green Felt
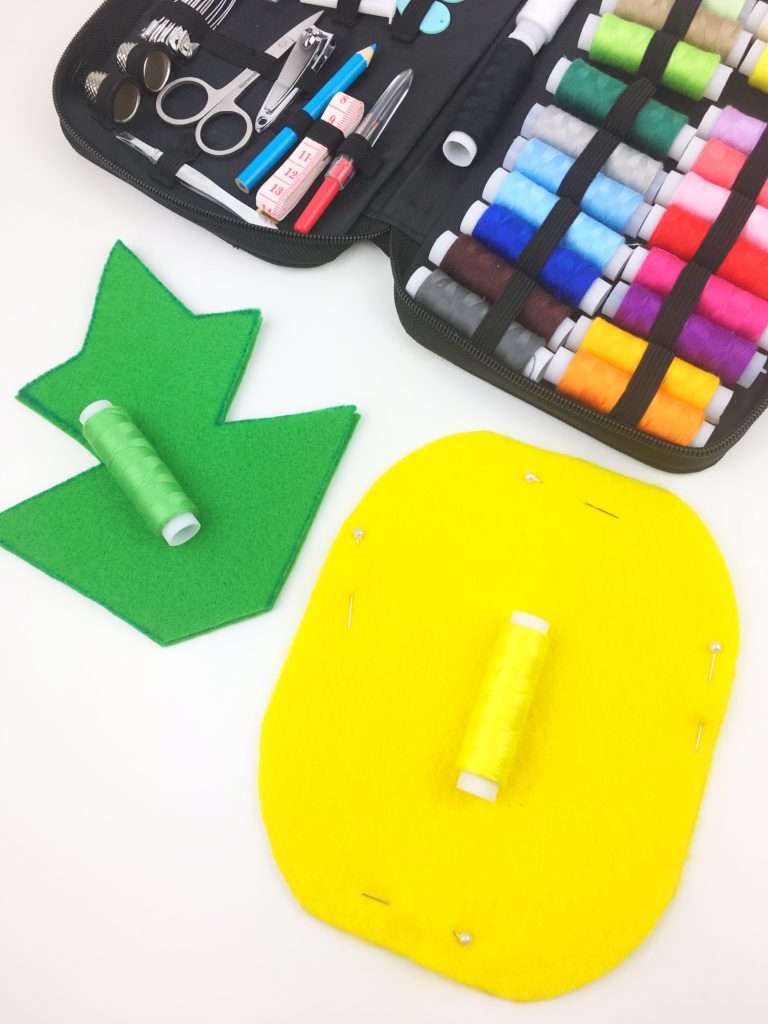
- Needle (We are using this Sewing Kit)
- Yellow Thread
- Green Thread
- Scissors
- Pins
- Polyester Fiberfill
- Our Free Pineapple Softie Printable
Let’s Get Making!
Print the Pattern – Save a copy of the Pineapple Pattern Template PDF to your computer and then print it full size without any scaling or cropping. Cut out the pineapple stem pattern, and the pineapple fruit pattern from page 2.
Instructions:
Cut out the felt pieces
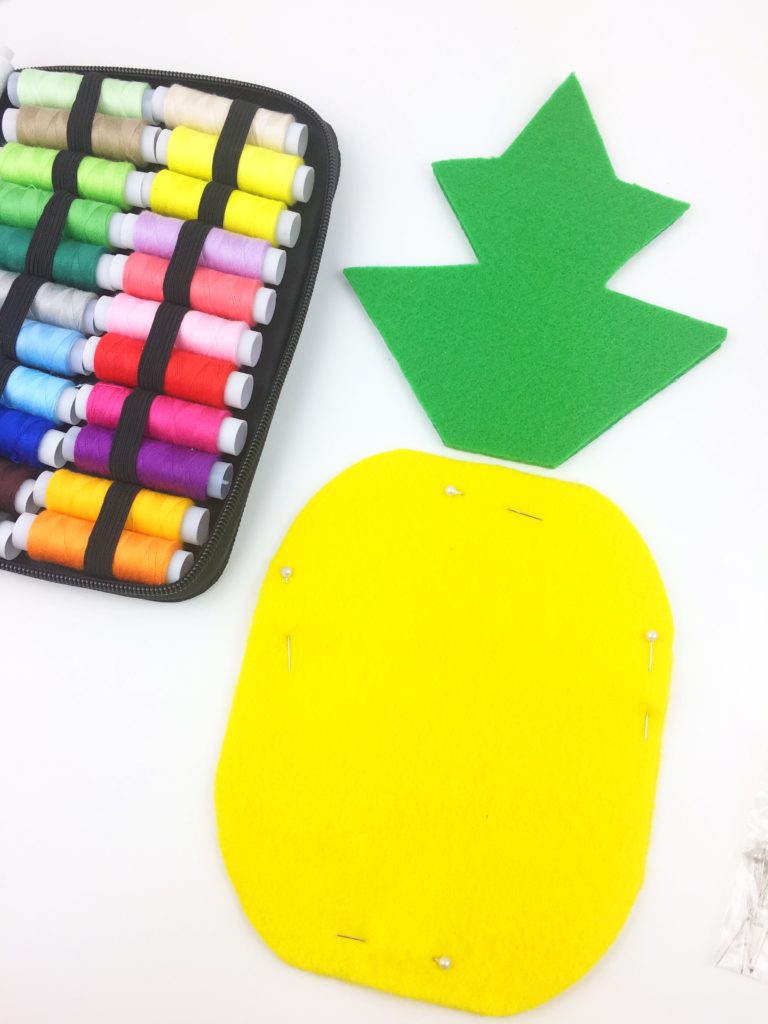
1.) Cut the yellow sheet of felt in half. Line the paper pattern up with the bottom straight edge of the felt, and pin around the edge. Cut out the felt pineapple shape. Repeat this process with the second half of yellow felt.
2.) Cut the green sheet of felt in half. Line the paper stem pattern up with the bottom straight edge of the felt, and pin around the edge. Cut out the felt stem shape. Repeat this process with the second half of green felt.
Sew Felt Pieces Together and Stuff
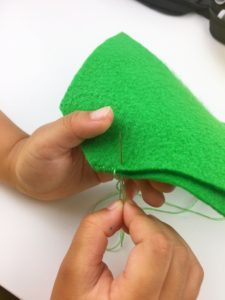
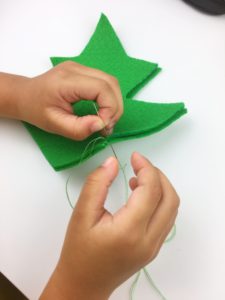
3.) Leave an opening at the bottom of the stem to stuff the fiberfill. Sew the green stem felt pieces together, around the edge, using green thread.
4.) Stuff the green stem with polyester fiberfill, then sew the bottom of the stem closed.
5.) Leave an opening at the top of the pineapple to stuff the fiberfill. Sew the yellow pineapple felt pieces together, around the edge, using yellow thread.
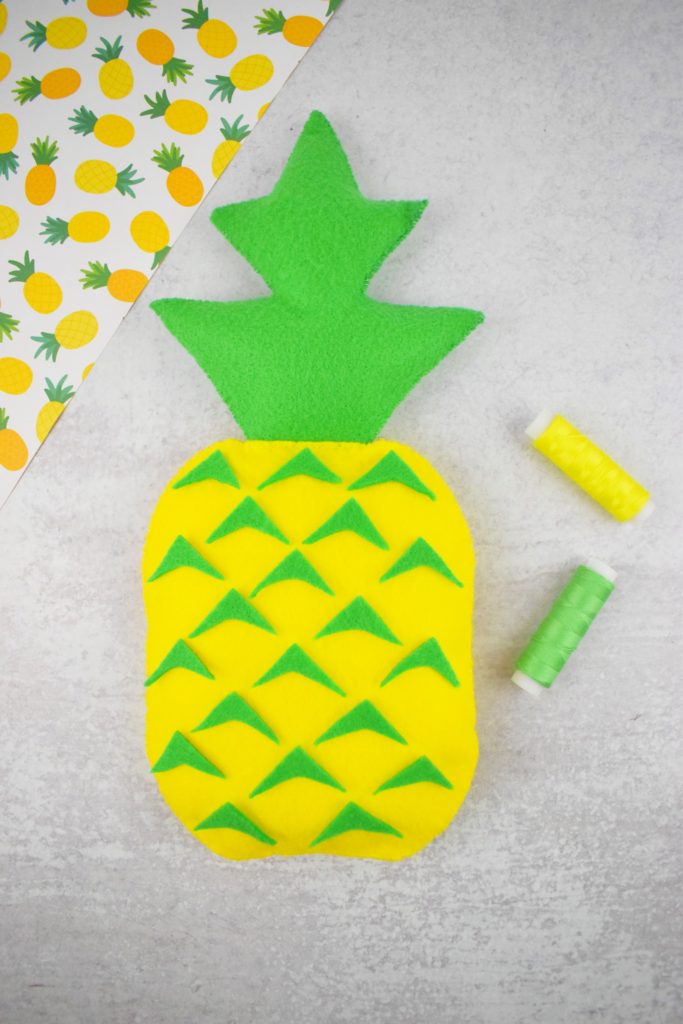
6.) Stuff the pineapple with polyester fiberfill and leave a partially flat surface so the felt counting pieces will stick and not fall off.
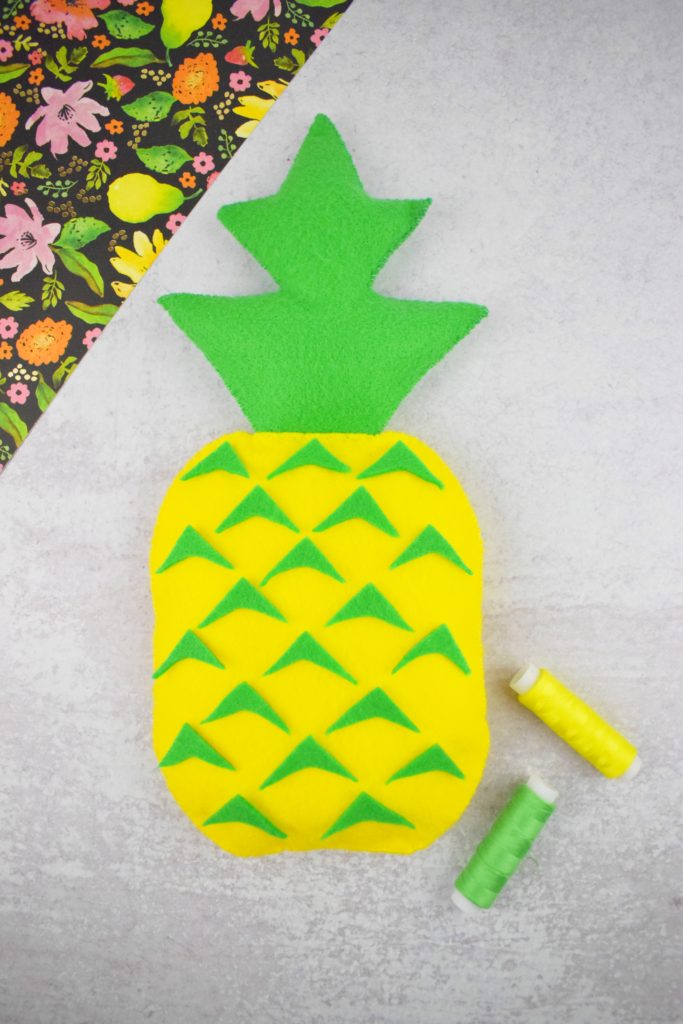
Assemble the Pineapple
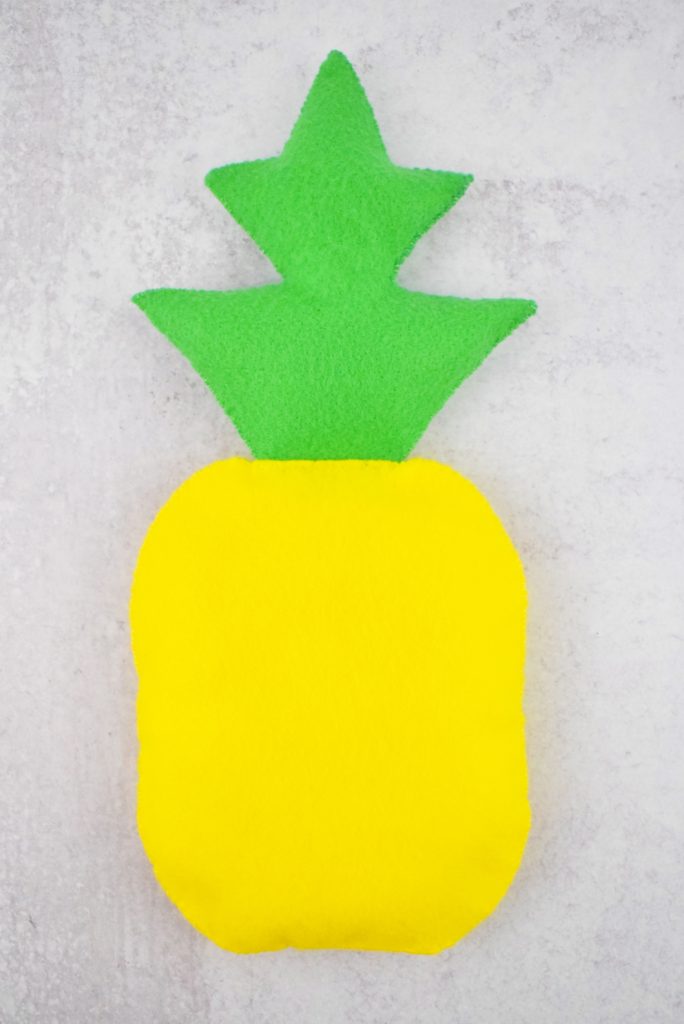
7.) Place the green stem inside the yellow pineapple and sew directly across with yellow thread, securing the stem to the fruit.
Cut the Felt Math Manipulatives
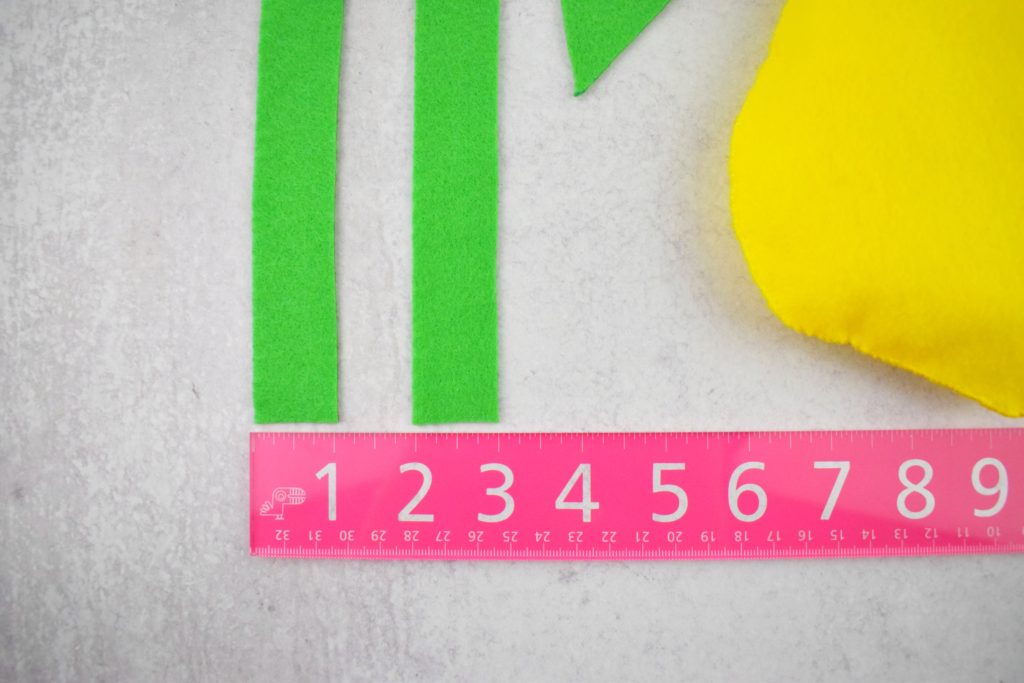
8.) Use the remaining green felt pieces, and cut two 1″ strips.
9.) Cut the 1″ strips into ten, 1″ squares.
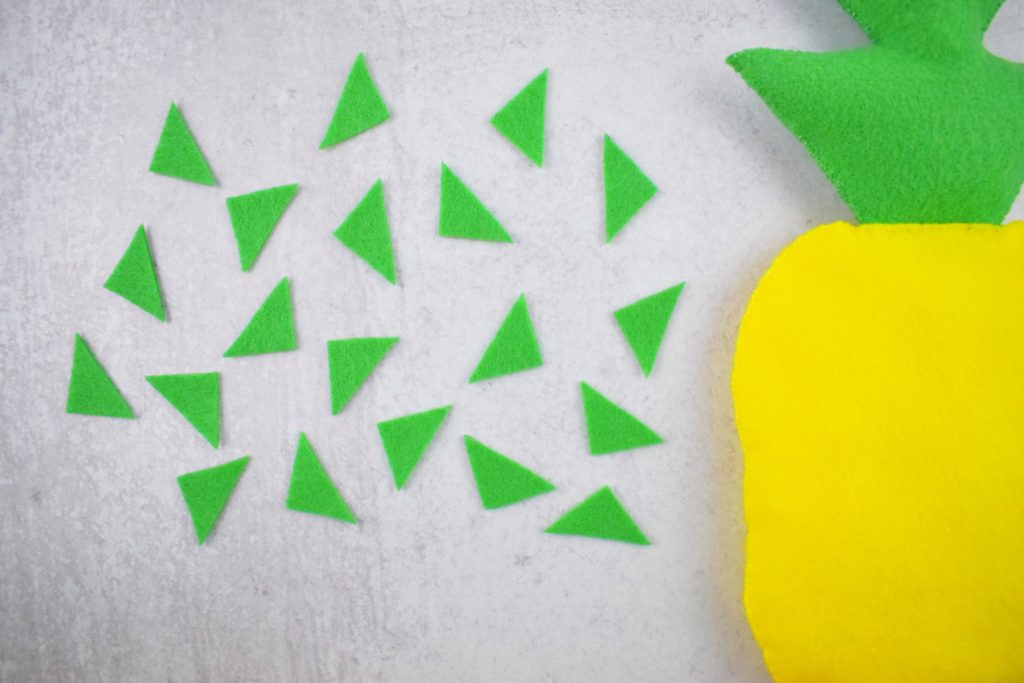
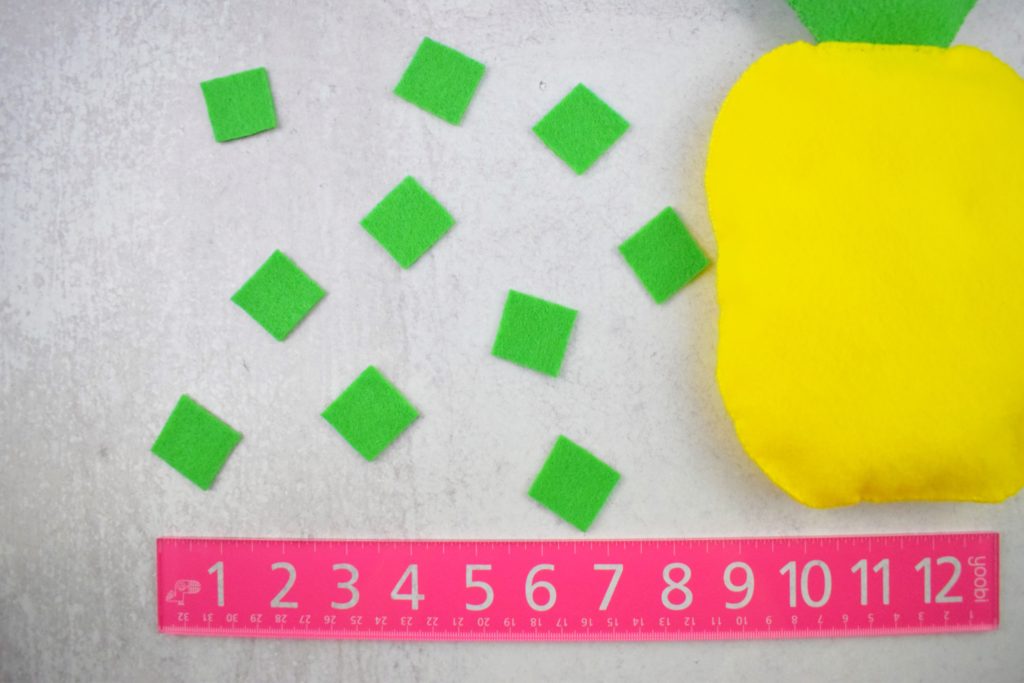
10.) Cut each square diagonally to make 2 triangles.
11.) Using the paper pattern as a visual guide, slightly cut a bit off each triangle to make a pointy boomerang shape. Ten 1″ squares will make 20 manipulatives. Make more as needed.
Tip: For older kiddos, you can make more to use for addition and subtraction.
Update: I’ve decided to add a small pocket with a button closure on the back to store the math manipulatives in.
Isn’t it sweet? Thanks for joining me. Don’t forget to visit the Sew a Softie Tutorials page for more great beginner’s projects.
Happy Crafting, Misty x
This post was written by Misty Hill and appeared first on The Maternal Hobbyist
Disclosure: Some of the links in the post below are “affiliate links.” Therefore, if you click on a link and purchase the item, we will receive a small commission. Regardless, we give our promise that we only recommend products or services that we use personally. Above all, we believe this adds value to our readers.

What a great tutorial. I love that you introduced sewing to your daughter when she was one. A future Sew a Softie ambassador I hope 🙂 Thanks for joining the tutorial hop 🙂
She is most definitely a future sew a softie ambassador. We are working with our local library to teach other kids to sew in a once a month sewing club class. Last month we created pencil pouches with button closures. Miss 3 loves to teach other kiddos. We’ll be joining you again soon.